|
|
||
|
Z-Merge Tutorial
|
|
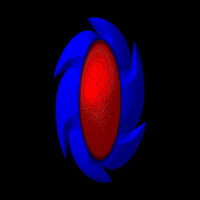
In this tutorial you will be using the Z-Merge Tool to create a realistic 3D Object. As I wrote on my page How I Did Them I cannot stress too much how much the importance of *play* is in PI or in fact any graphic program. This tutorial is another I have written which depends a lot on you, the reader, to expand upon what I have set out. |
|
This was done using PhotoImpact 10 Experience : Beginners |
||
|
Tools you will be using: Path Drawing Tool Z-Merge Tools Material Attributes
|
|
My Abbreviations of PhotoImpact commands are thus: R/c = Right click (or other click whichever you use) Commands separated with a forward slash (/) = the order of the commands or the options within a command. |
|
1. Open a new image 400x400
|
||
|
2. Select Path Drawing Tool
|
||
|
3. From the Attribute Bar /Shape choose a shape. Color not important just now. Mode 3D Round
|
 |
|
| 4. Draw your shape on your canvas. | Tip!! If the shape you want is round or an ellipse just play with the transform tool. It is amazing how changing the size of some of the custom shapes changes the whole look of the shape. | |
|
5. Open your Easy Pallet and scroll down to Material Attributes/ Color and choose a color you like.
|
||
|
6. Go to Bump and choose a bump you like. I am using M48
|
||
|
7. You can also play with all the other effects in Material Attributes if you wish or you could just leave this plain.
|
||
|
8. When you have finished playing *smile* R/C Align/Center Both
|
||
|
9. Go back to the Attribute Bar and change the color to a color that will look good with your first color
|
||
|
10. Using your Path Drawing Tool again draw an ellipse to fit the center of your shape
|
|
11. Play some more with the Material Attributes if you wish
|
||
|
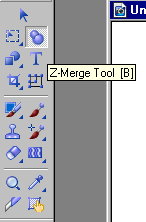
12. Select your pick tool and make sure that your first shape is selected. Go to the tool bar and click on the Z-Merge Tool.
|
 |
|
|
13. Up to the Attributes Bar and put a check in the Z-Merge Box. UHOH!! Our second shape has disappeared ,but we will get it back have no fear *Grin*
|
||
|
14. Still in the attributes bar move along to the E-Elevation drop down button and slide the slider to about -23 or you can just use the down arrow and click till it gets where you want it. See!! I told you your second shape would reappear *Grin*
|
TIP!! Depending on your first shape you can also get some interesting shapes as you click down. | |
|
15. Select your center shape by clicking on it and use the Z-Merge tool as above but this time work upwards by clicking the up arrow on the E-Elevation bar.
|
|
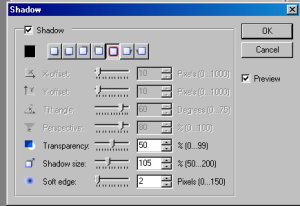
16. With the center Shape still selected R/C Shadow and use the all round Shadow with these settings for Transparency 50 Shadow Size 105 Soft Edge 2.
|
 |
|
|
17. R/C Split Shadow
|
||
|
18. Open your layer Manager and select the shadow by clicking on it to highlite it.
|
TIP!! It will be under the center shape and will look like a black shape on a grey background. | |
|
19. Go back to the Z-Merge Tools as above and slowly bring the shadow to the top about 35 should be about right.
|
||
|
20. R/C on the Background and select all.
|
|
21. Edit/ Fill. Fill the background with your chosen color.
|
TIP!! I have found that a Black Background really gives Z-Merge a 3D look . Specially if viewed in subdued light. | |
|
22. R/C Merge All.
|
|
You can also add more shapes around your creation. I hope you have enjoyed this tutorial and that you will play with Z-Merge a lot. I would love to see what you have created. There are some more example of the same type in my Digital Art Gallery |
||
|
paho ©2008
|
|
(Tutorials)
|
||||